
Grail Grenade Callouts in CS2
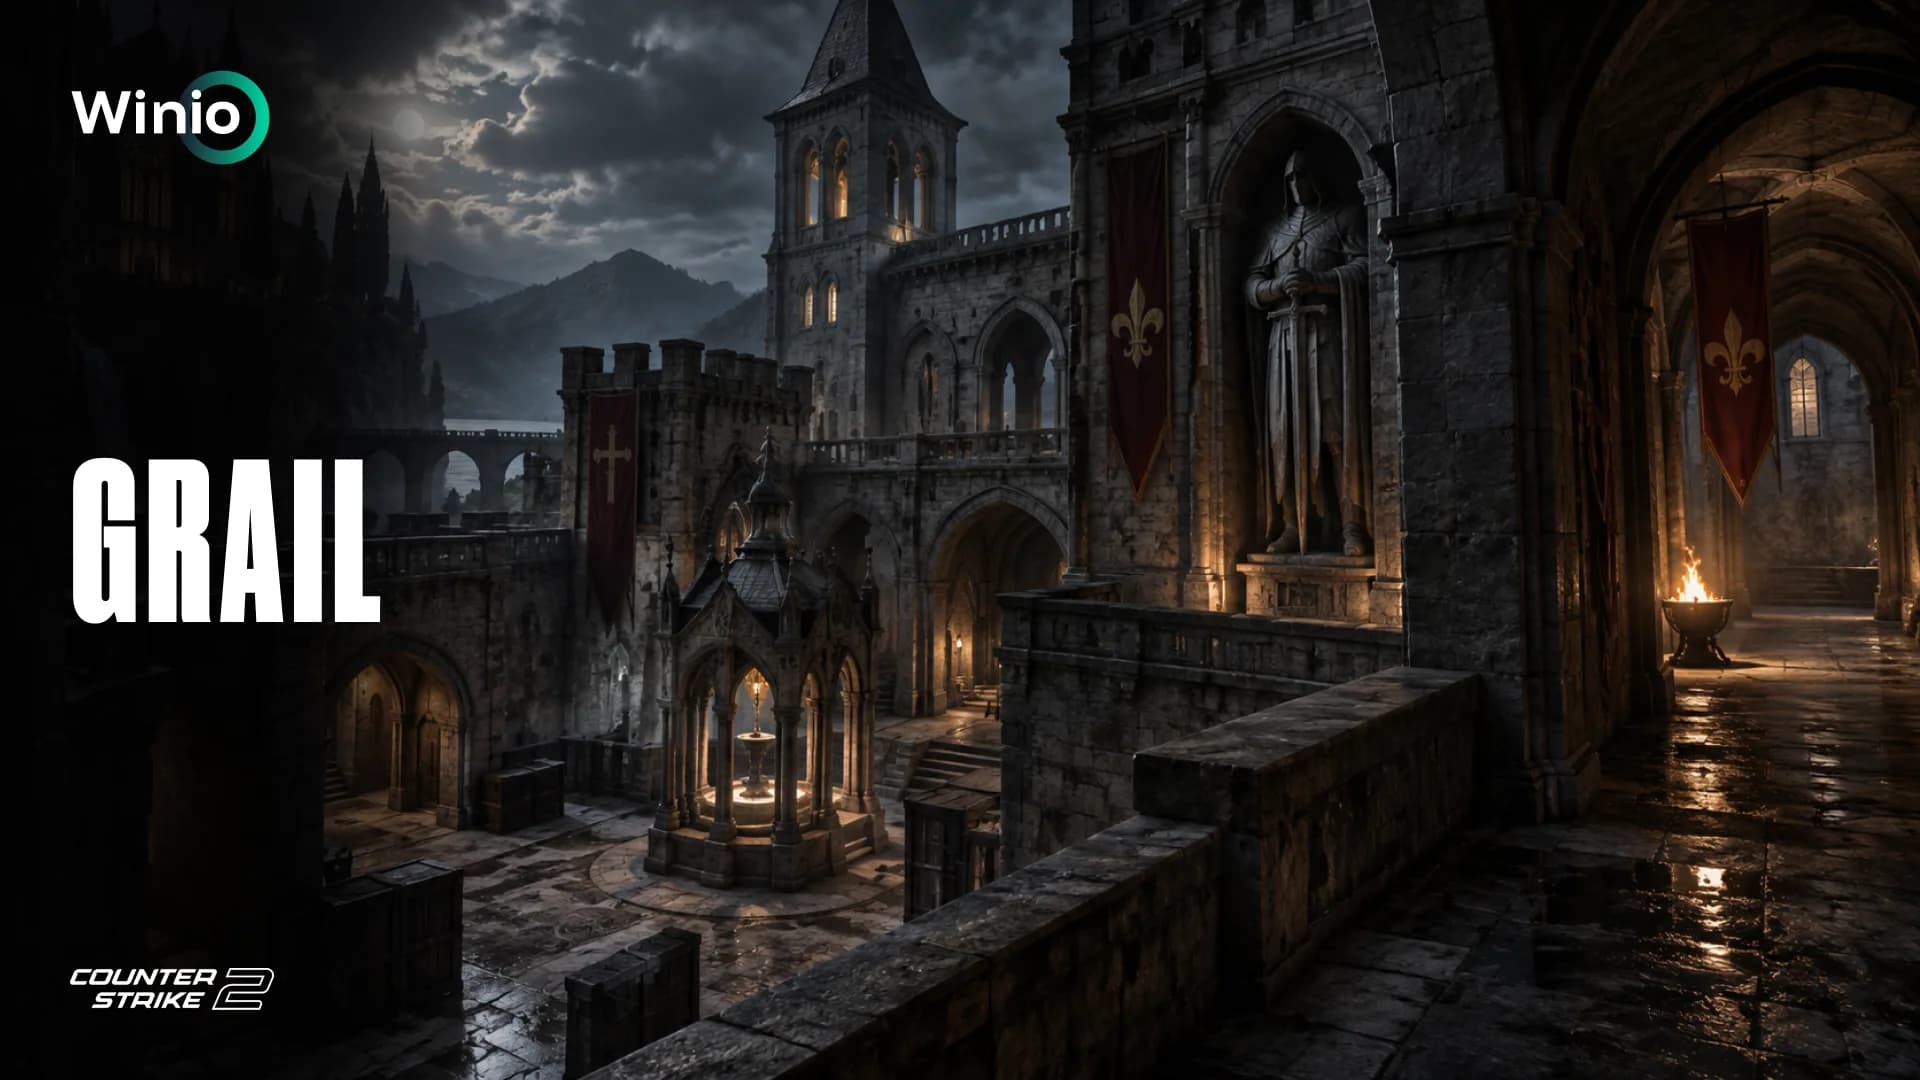
Grail is almost impossible to confuse with another Counter-Strike 2 map.
Instead of a mili city, players enter a colorful fantasy mini-golf course filled with castles, treasure, towers and a giant octopus.
Behind the unusual presentation is a fasortly after the round begins, while Mid provides quick routes toward both bombsites. Without smokes and flashes, the Terrorists can easily become trapped in arrow site entrances.
This guide covers the essential Grail grenade lineups, including utility for Mid control, A and B executes, defensive setups, retakes and post-plant situations.
What Is Grail in CS2?
Grail, also known as de_grail, is a community-created bomb-defusal map.
It was designed by Radu Tanasie, Bartlomiej “Lizard” Guzek and Florian “flowlee” Wagner. The creators describe Grail as a bomb-defusal map set inside a stylized fantasy mini-golf course.
Valve added Grail, Jura and Agency to Competitive, Casual and Deathmatch modes on May 7, 2025. The maps were placed inside a separate Community Map Group.
Who wins?
All MatchesFree Today NODWIN Clutch Series #12
Tomorrow 11:00
 SPARTABAKS
 Free for everyone · factor breakdown
Prediction: SPARTA
71%29%NODWIN Clutch Series #12
Today 11:00
 BRUTEG2 Ares

Grail was removed from all official modes on October 1, 2025, together with Jura, Dogtown and Brewery. Palacio, Golden, Rooftop and Transit replaced them.
Grail is not currentl Duty map pool. Players can practice it through an available community version or on community servers.
Why Utility Matters on Grail
Grail combines fast timings with several unusual angles.
Mid contains multiple directions for long-range fights. B includes important positions around Window, Pit and Banana. On A, the attackers may need to clear Stairs, Halls, Boxes and Tentacles during the same execute.
Without utility, one CT can hold a narrow entrance while another watches the next angle from a protected position.
Grenades allow teams to:
- Remove distant AWP positions
- Divide the defendetions
- Clear Pit, Boxes and Tentacles
- Cross open sections safely
- Create space for the bomb plant
- Control retake routes
- Delay the defuse
CSNADES.gg lists 16 community smoke lineups for Grail.
This does not mean that smokes are the only useful grenades on the map. Many effective flashes, Molotovs and HE grenades can be thrown situationally without a complicated lineup.
Essential Grail Callouts
Grail remained in official matchmaking for less than five months. Its callout system never became as standardized as the terminology on Mirage, Inferno or Dust 2.
Players created their own names based on visible objects. Common examples included Pizza, Rapunzel, Tentacles, Dungeon, Mid Water and Mid Sand. More familiar terms such as Window, Door, Ramp, Stairs, Pit and Banana were also used.
Confirm the terminology with your teammates before the match.
Grail Mid Callouts
Useful central callouts include:
- Mid
- Top Mid
- Mid Water
- Mid Sand
- Rapunzel
- Window
- Door
- Bridge
- Dungeon
- Connector
- CT Mid
- Heaven
Rapunzel usually refers to the central tower. The name matches the fantasy setting and makes the position easy to identify.
Mid Water and Mid Sand distinguish between different sections or levels of the central area.
Grail A Site Callouts
The main A-side callouts include:
- A Site
- A Main
- Pizza
- Ramp
- Hole 9
- Stairs
- Halls
- Tentacles
- Boxes
- Default
- Back Site
- CT
- Connector
- Close
Pizza, Ramp and Hole 9 may describe one general approach or separate parts of the route, depending on the team.
Tentacles refers to the recognizable area around the giant octopus decoration.
Grail B Site Callouts
The main B-side callouts include:
- B Site
- B Main
- B Banana
- B Window
- Pit
- B Short
- B Long
- Connector
- CT
- Default
- Back Site
- Boxes
- Close
- Heaven
Consistency matters more than finding one universally correct name. If your team uses different terminology, agree on it before the first round.
How to Practice Grail Grenade Lineups
Load an available version of Grail on a private server and enable the developer console.
Use the following commands:
- sv_cheats 1
- mp_warmup_end
- mp_roundtime_defuse 60
- mp_freezetime 0
- mp_buy_anywhere 1
- mp_buytime 9999
- sv_infinite_ammo 1
- ammo_grenade_limit_total 5
- sv_grenade_trajectory_prac_pipreview 1
- sv_rethrow_last_grenade
- bot_kick
The sv_rethrow_last_grenade command repeats the previous throw.
After throwing a grenade, move to the defensive position and check:
- Whether the smoke completely blocks vision
- Whether a gap remains near a wall
- Whether the CT can see a crossing player’s legs
- Which escape routes remain outside a Molotov
- Which positions are actually blinded
- Whether the grenade activates before the execute begins
Grail contains rounded objects, decorative structures and unusual surfaces. Hitting a slightly different part of a model may significantly change the grenade trajectory.
Essential Mid Smokes on Grail
Mid creates most of the attacking flexibility on Grail.
Controlling it opens the route toward Stairs and A, creates pressure on B through Short or Connector and limits defensive rotations.
Rapunzel Smoke
The central Rapunzel tower provides vision over part of Mid.
A smoke in this position removes the long-range angle and allows the Terrorists to approach the central routes.
It can support:
- A complete Mid take
- An A split
- Pressure toward B
- A late rotation
- A fake
- A player watching CT movement
The smoke should fully block the tower. If it lands too deep, the defender may move close to the edge and find another angle.
Mid Window Smoke
Window is one of the most dangerous defensive positions during a Mid take.
A CT player can watch Top Mid and support the nearby passages. Once Window is smoked, the Terrorists can approach Door and Connector more safely.
Do not completely ignore the position. A defender can hide inside the smoke, push through behind a flash or wait for it to expire.
Door Smoke
Door controls movement between several central areas.
Smoking it can:
- Isolate the Mid defender
- Block a rotation
- Create access to Mid Water or Mid Sand
- Prepare an attack through Stairs
- Hide a change of direction
- Support a fake toward one bombsite
Use a flash before approaching the smoke. A CT may stand close to the doorway and wait for the first Terrorist.
CT Mid Smoke
A deep CT Mid smoke blocks another distant defensive angle.
It works especially well with the Window smoke. Together, these grenades reduce the number of positions the entry player must clear.
Do not throw both smokes too early. If the team delays the execute, the defense may regain vision before the split begins.
Mid Heaven Smoke
Grail contains several elevated defensive positions.
A Mid Heaven smoke separates the high-ground player from the fight and lets the Terrorists focus on opponents at the lower level.
Watch for a CT pushing through the smoke after Mid has been taken.
Flashes Above Mid
A high flash can blind players at:
- Window
- Rapunzel
- Door
- CT Mid
- Heaven
- Bridge
Two sequential flashes are usually stronger than throwing both at the same time.
The first makes the defenders turn or retreat. The second supports the actual entry duel.
Door Pop Flash
A pop flash near Door should activate before the defender has time to react.
It works best when one Terrorist throws the grenade for another. A self-flash often takes too long and warns the opponent before the peek.
HE Grenade for Window
If the CT side repeatedly uses Window, throw an HE grenade before taking Mid.
Even partial damage can force the defender to stop peeking or give the entry player an advantage in the following duel.
HE Grenade for Door
An HE grenade can punish a player waiting behind Door for the Mid smoke to disappear.
Combine it with a flash and a coordinated double peek.
Standard Mid Take
A basic Mid utility set includes:
- Window or Rapunzel smoke
- Door smoke
- CT Mid smoke
- Two flashes above Mid
- HE grenade for the closest defensive position
Taking Mid does not require an immediate bombsite commitment.
One player can stay behind to watch rotations while the rest of the team returns toward Pizza or B Banana.
Grail A Site Grenade Lineups
The Terrorists can approach A through Pizza, Stairs and the central connections.
The defense can use Boxes, Halls, Tentacles and deep CT positions. Without smokes, the attacking team may need to check several dangerous angles simultaneously.
A CT Smoke
The main CT smoke blocks the rotation route and one of the longest defensive sightlines.
It gives the Terrorists time to:
- Enter the bombsite
- Clear Boxes and Tentacles
- Plant the bomb
- Establish post-plant positions
- Prepare for the retake
Assign one player to watch the smoke after the plant.
Halls Smoke
Halls can provide support for the A defenders.
Smoking it isolates the area and allows the Terrorists to clear the main part of the bombsite first.
The smoke should block the passage without creating extra protected space near the center of A.
A Connector Smoke
Connector links A with Mid.
Blocking it limits defensive support and makes the retake more difficult. The grenade becomes particularly useful after the Terrorists have already shown pressure in the center.
The CT side cannot immediately tell whether the smoke represents a real split or a fake.
Back Site Smoke
A deep Back Site smoke isolates a defender playing behind the main plant area.
The Terrorists can then clear the positions in order:
- Close corners.
- Boxes.
- Tentacles.
- Default.
- The Back Site smoke.
Do not begin planting while a hidden defender can still push through unnoticed.
Tentacles Smoke
Tentacles is a recognizable area and a potential defensive position.
Use a smoke when the team wants to isolate it temporarily. A Molotov is generally better when the objective is to force the defender away.
Check the edges carefully. The unusual geometry around the decorative objects may create small gaps.
Tentacles Molotov
A Molotov forces the defender to leave the position.
The entry player should already be watching the expected escape route. A second Terrorist should prepare to trade if the CT moves toward Halls or Back Site.
Boxes Molotov
Boxes allow a defender to survive the initial flashes and peek while the bomb is being planted.
The fire removes this cover and forces the CT into the open. An HE grenade before the Molotov can make the combination even stronger.
Close Molotov
The close corner should be cleared before a fast execute.
This is particularly useful against pistols, SMGs and shotguns, which are strongest inside narrow entrances.
A Site Flashes
High flashes above A can blind defenders at:
- Default
- Boxes
- Tentacles
- Halls
- Back Site
- CT
- Connector
Use the first flash to cross the entrance and the second to clear the deeper positions.
HE Grenade for Default
Default is a predictable position during the defense, bomb plant and defuse.
An HE grenade can damage a defender behind cover, interrupt a plant or force a CT to stop defusing.
Standard A Execute
A basic A execute can include:
- CT smoke
- Halls or Connector smoke
- Tentacles smoke or Molotov
- Boxes Molotov
- Two flashes above A
- HE grenade for Default
The Pizza and Stairs groups should enter together.
If one side attacks too early, the CTs can eliminate that group before turning toward the second entrance.
A Split Through Mid and Stairs
The Terrorists begin by taking Mid.
Part of the team moves toward Stairs while the main group attacks through Pizza or A Main. Smokes block CT and Connector, followed by flashes above the site.
The Stairs players do not need to find the opening kill. Their first objective is to divide the defenders’ attention and block movement between A and Mid.
Grail B Site Grenade Lineups
B includes early fights around Banana, control of Window and a dangerous defensive position in Pit.
The Terrorists need to remove the distant angles and clear the lower positions before committing to the site.
B Window Smoke
Window controls the B approach and supports the fight for Banana.
It is one of the most important B-side smokes. Once it activates, the Terrorists can approach without taking an immediate long-range duel.
The smoke must completely cover the opening. Even a small gap may allow an AWPer to see players crossing.
B CT Smoke
The CT smoke blocks the main rotation route and isolates the defenders already inside B.
It should activate before the first Terrorist leaves B Main or Banana.
Continue watching the smoke after the bomb plant. A rotating defender may attempt to push through before the attackers establish their positions.
B Connector Smoke
Connector allows the defense to support B from Mid.
Smoking it restricts the rotation and divides the retake. It can also be used in a fake before the Terrorists return through Mid.
B Heaven Smoke
The elevated Heaven position creates another vertical angle over B.
A smoke allows the entry players to concentrate on Pit, Boxes and the ground-level defenders.
Do not forget that a CT can later emerge from the smoke.
Back Site Smoke
A deep smoke isolates the far B defender.
The Terrorists can clear the closest positions first, then prepare for the opponent to leave Back Site.
Avoid planting until the team has someone watching the smoke.
Pit Molotov
Pit is difficult to clear with a dry peek.
A Molotov forces the defender to:
- Leave the position
- Move deeper
- Appear in front of the Banana players
- Spend a smoke
- Give up control
If the fire is extinguished, throw a flash before continuing the attack.
Boxes Molotov
A player behind Boxes can punish Terrorists who are focused on Window, Pit or Heaven.
The Molotov clears the position and creates additional planting space.
Close Molotov
A close Molotov prevents a defender from holding the entrance at short range.
Begin moving while the area is still burning. If the team waits, the CT can return before the entry begins.
B Site Flashes
Useful flashes can blind players at:
- Window
- Pit
- Heaven
- Default
- Boxes
- Back Site
- CT
Low flashes through Banana are easier to see. Whenever possible, use trajectories that detonate above walls or decorative structures.
HE Grenade for Pit
Throw an HE grenade into Pit before the Molotov.
The first grenade deals damage, while the fire forces the weakened defender into the entry player’s crosshair.
Standard B Execute
A basic B execute can include:
- Window smoke
- CT smoke
- Connector or Heaven smoke
- Pit Molotov
- Boxes Molotov
- Two flashes above B
The team should enter immediately after the smokes activate.
Waiting near Banana gives the CT side time to rotate and throw defensive utility.
B Split Through Mid
Part of the team takes Mid and blocks Door or Window.
The other players maintain control of B Banana. After the CT and Heaven smokes activate, both groups attack the site simultaneously.
The Mid players must arrive on time. Their role is to divide the defense before the first contact on Banana.
CT-Side Utility on Grail
Fast opening timings make defensive utility particularly important.
The CT side should still avoid throwing every grenade automatically. A late smoke at a narrow entrance may stop an entire final execute.
Early Mid Incendiary
An incendiary delays a fast Mid take and forces the Terrorists to wait or use a smoke.
If the fire is immediately extinguished, the CT side receives information about possible Mid pressure.
Prepare an HE grenade or flash, but do not push through the smoke without support.
Defensive Top Mid Smoke
A Top Mid smoke blocks early Terrorist vision.
It allows the CT side to:
- Take a close position
- Move an extra defender
- Prepare a pop flash
- Fall back safely
- Hide an A or B rotation
Change the timing between rounds. A predictable smoke becomes an easy reference point for the opposing team.
Early Pizza Incendiary
The incendiary delays a fast A attack.
If the Terrorists extinguish it, the defenders should prepare for immediate contact. An HE grenade thrown behind the smoke may damage several grouped players.
Early B Banana Incendiary
This grenade prevents the Terrorists from taking Banana for free.
The main objective is not always to secure a kill. Delaying the attackers for several seconds gives the B defenders time to take stronger positions.
Stairs Smoke
A defensive Stairs smoke can separate an A split.
The Stairs group loses the ability to support the Pizza players immediately. The CT side can temporarily focus on one entrance.
B Main Smoke
A late B Main smoke becomes extremely powerful when the Terrorists have little time remaining.
They must:
- Wait
- Push through without information
- Spend their remaining utility
- Change the final destination
- Enter without clearing the complete site
Defensive Pop Flashes
Useful defensive flash targets include:
- Top Mid
- Door
- Pizza
- Stairs
- B Banana
- B Main
- Connector
The flash should be thrown by a supporting teammate. The player taking the duel calls the timing.
A Retake Utility
A coordinated A retake can use:
- Smoke on the bomb
- Pizza or Stairs smoke
- Tentacles Molotov
- Boxes Molotov
- HE grenade for Default
- Flash above the main site
Isolate one post-plant position before challenging the remaining Terrorists.
B Retake Utility
A basic B retake can include:
- B Banana smoke
- Smoke on the bomb
- Pit Molotov
- Back Site Molotov
- HE grenade for Boxes
- Two sequential flashes
Use the first flash to enter the site and the second to support the final move toward the bomb.
Master the Utility, Then Read the Round
Grail’s colorful design may make the map appear chaotic, but most rounds are decided by familiar Counter-Strike principles.
Mid control limits defensive rotations. Smokes separate the CT positions. Molotovs remove players from Pit, Tentacles and Boxes. Flashes allow the entry player to begin each duel with an advantage.
The objective is not to memorize every possible lineup. Understanding when and why each grenade should be used is much more important.
The same details influence professional Counter-Strike. Team form, map pools, side-specific results, player roles and utility efficiency can change the probability of victory before the match begins.
Winio analyzes these variables across thousands of matches to show what the data says before the server decides the result.
Explore upcoming CS2 matches and data-driven predictions at Winio.