
Sanctum Grenade Callouts in CS2
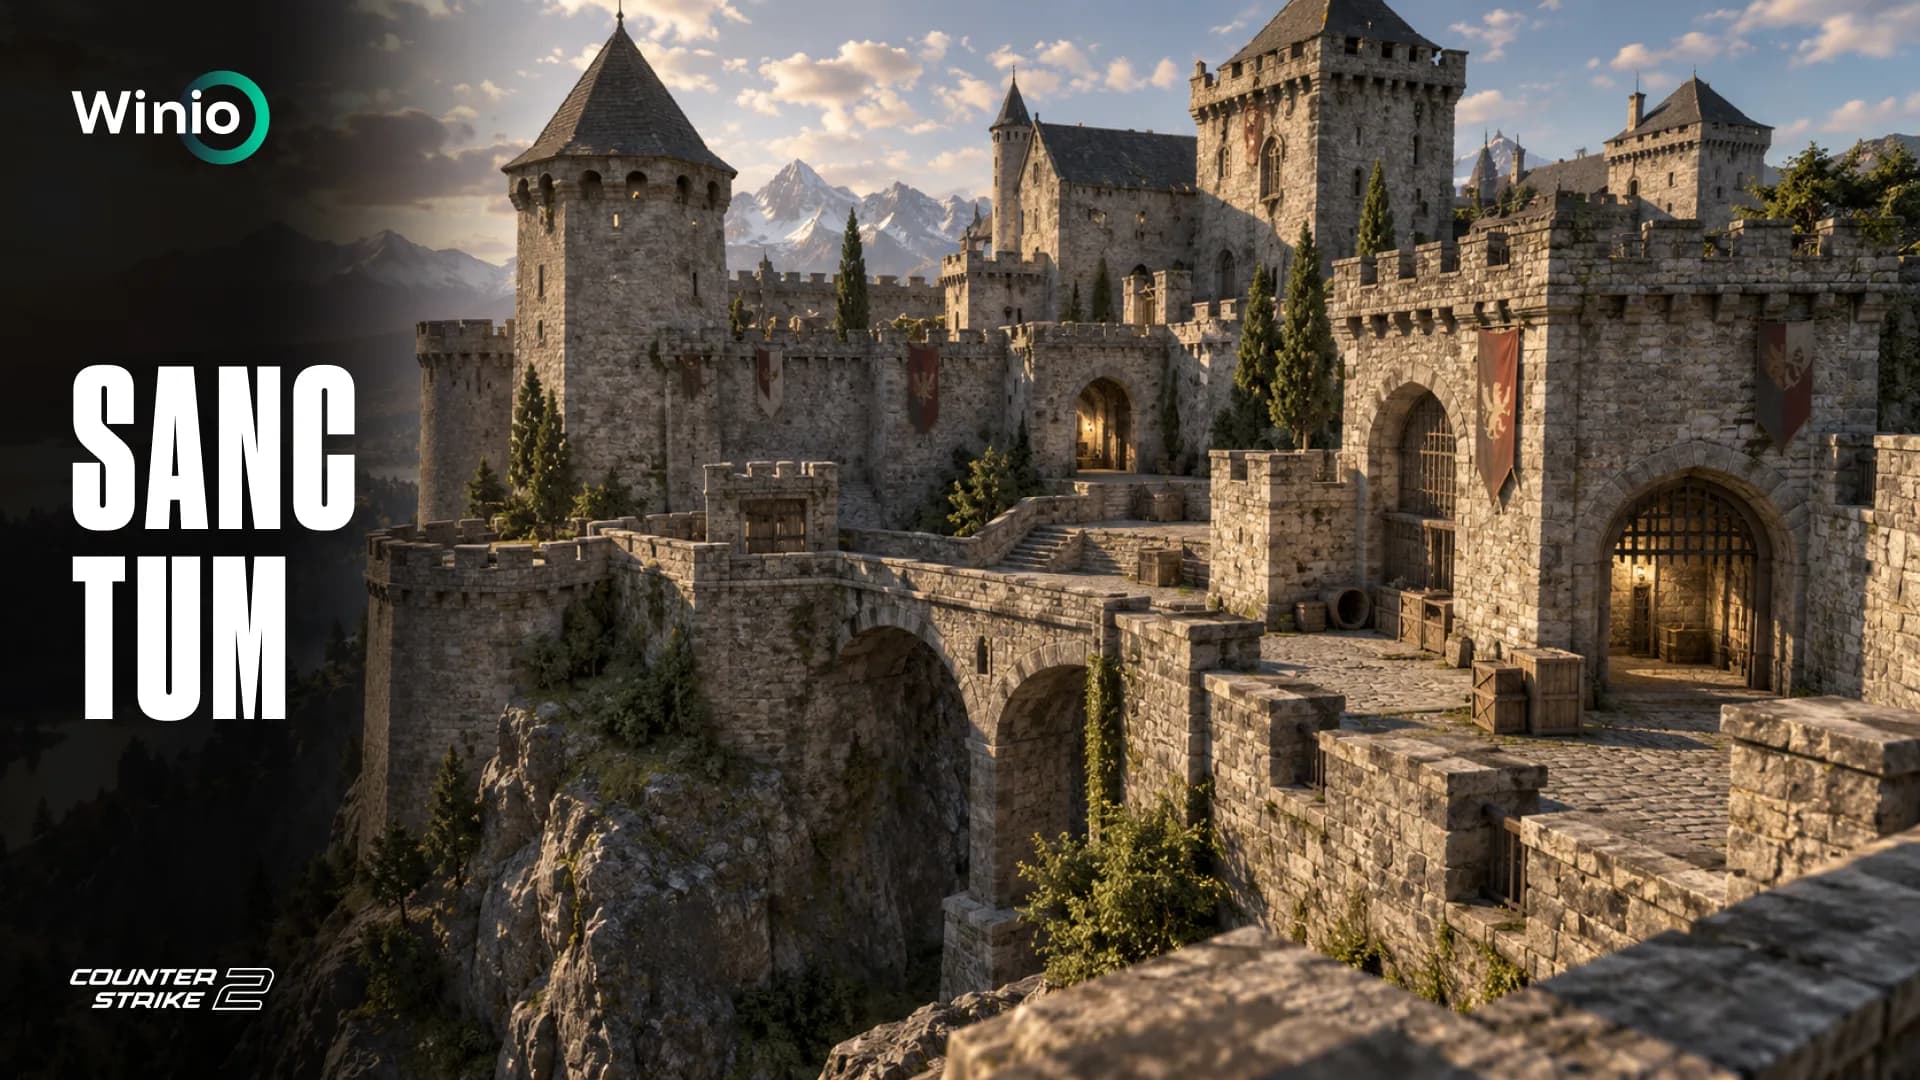
Sanctum takes Wingman into the ruins of an ancient temple, where broken bridges, stone pillars and vertical positions make every site execute a test of coordination.
The map was designed specifically for two-versus-two matches. It contains one bombsite, short rotations and several routes that converge around Mid. Losing control of the center allows the opponent to change direction quickly, while one correctly placed smoke can completely isolate the second defender.
This guide covers the essential Sanctum callouts, smokes, flashes, Molotovs and HE grenades, along with attacking strategies, CT setups, retakes and post-plant positions.
What Is Sanctum?
Sanctum, also known by its technical name de_sanctum, is a community-created Wingman map.
Five creators worked on the project:
- Twist handled environment art
- Rainless created the props
- Ruban worked on level design
- GURIN created digital artwork
- Rastick provided additional level design support
The action takes place inside the wreckage of an ancient temple under reconstruction. The Terrorists intend to destroy the cultural site, while the Counter-Terrorists must stop the attack.
Who wins?
All MatchesFree Today NODWIN Clutch Series #12
Tomorrow 11:00
 SPARTABAKS
 Free for everyone · factor breakdown
Prediction: SPARTA
71%29%Exort Series #32
LIVE
 BezprizornikiEVOLUPEGG

The creators also introduced a legend about a jungle spirit that will awaken if the temple collapses.
The first version of Sanctum was published in the Steam Workshop on January 9, 2026.
Valve added Sanctum and Poseidon to the official Wingman pool on January 21, 2026. The addition was announced in the official Counter-Strike 2 update notes.
Sanctum was removed from all official modes on July 8, 2026, together with Warden, Stronghold and Alpine. Debris and El Dorado replaced it in Wingman, according to the official update notes.
The map is no longer available through standard matchmaking. Its Workshop page remains online, although compatibility with the current CS2 build should be checked before launching it.
How Sanctum Plays
Sanctum combines narrow entrances with an open central area and several elevated positions.
Its main gameplay features include:
- The importance of Mid control
- Several routes toward the single bombsite
- A damaged bridge in the center
- An elevated Heaven position
- A Connector leading toward the site
- Protected angles around stone pillars
- Vertical movement between Mid and Lower Mid
- Short flanking routes
- Fast rotations
The first engagements often happen around Mid, Ramp and Broken Bridge.
Once the Terrorists control the center, they can pressure Connector, move toward Heaven or split the defenders with an attack from multiple directions.
The CT side begins closer to the bombsite and can use strong positions around the pillars, Temple Wall and Back Site. However, defending too passively gives the Terrorists time to surround the site and isolate one player.
Essential Sanctum Callouts
Sanctum remained in the official map pool for less than six months, so its callout system never became completely standardized.
Teams may use different names for the same area. Agree on simple terms before playing with a new teammate.
Useful Sanctum callouts include:
- T Spawn
- CT Spawn
- CT Stairs
- Ramp
- Ruins
- Side Hall
- Mid
- Lower Mid
- Broken Bridge
- Connector
- Heaven
- Temple Wall
- Site
- Default
- Plant Box
- Front Pillar
- Back Pillar
- Back Site
- Headshot Angle
These names follow the terminology commonly used in community Sanctum guides.
Why Utility Matters on Sanctum
Wingman has only two players on each team.
If one defender is blocked by a smoke or blinded by a flash, the second player may be forced to stop the entire execute alone.
Correct utility can:
- Create safe Mid control
- Block Heaven
- Isolate Connector
- Force a player away from a pillar
- Check Lower Mid
- Separate the defenders
- Protect the bomb planter
- Stop a fast execute
- Support a coordinated retake
- Delay the defuse
Every grenade should solve a specific problem. Throwing utility without moving afterward only gives the opponent information.
How to Practice Sanctum Grenades
Load Sanctum locally and enter the following commands:
- sv_cheats 1
- mp_warmup_end
- mp_roundtime_defuse 60
- mp_freezetime 0
- mp_buy_anywhere 1
- mp_buytime 9999
- sv_infinite_ammo 1
- ammo_grenade_limit_total 5
- sv_grenade_trajectory_prac_pipreview 1
- sv_rethrow_last_grenade
- bot_kick
The sv_grenade_trajectory_prac_pipreview 1 command displays the grenade’s trajectory and landing position.
The sv_rethrow_last_grenade command repeats the previous throw. Move to the opponent’s position before using it to check whether the grenade provides the expected result.
Use this practice routine:
- Find a corner that provides a repeatable starting position.
- Choose a clear landmark on the temple or construction equipment.
- Determine whether the throw is standing, running or jumping.
- Inspect where the grenade lands.
- Check the result from the opponent’s perspective.
- Save a screenshot of the lineup.
- Repeat the throw several times.
- Test the timing with your teammate.
Sanctum received multiple Workshop updates, so visual references and grenade trajectories may vary between versions.
Terrorist Smokes on Sanctum
Heaven Smoke
The Heaven smoke removes the elevated defensive angle and allows the Terrorists to focus on players inside the site.
Without this smoke, a defender in Heaven can:
- Stop the bomb plant
- Support Back Site
- Watch Connector
- Find an opening kill
- Retreat after taking contact
- Use the height advantage during the retake
The smoke must completely block the position. One Terrorist should watch for a push through it while the teammate clears the site.
CT Spawn Smoke
CT Spawn is one of the main defensive and retake routes.
A smoke temporarily separates the second defender and allows the Terrorists to attack the site player together.
The grenade should bloom before the entry player becomes exposed. A late smoke gives the CT enough time to reach Back Pillar or Temple Wall.
Connector Smoke
Connector allows defenders to support Mid and return to the bombsite quickly.
Blocking it:
- Protects the attack from a flank
- Simplifies the site execute
- Hides the bomb plant
- Forces the defender through smoke
- Allows the Terrorists to change direction
Watch the smoke edges. Connector is narrow enough for a defender with an MP9, shotgun or pistol to attempt an aggressive push.
CT Stairs Smoke
This smoke blocks the defender moving from CT Spawn toward Mid.
It is useful during an execute through Broken Bridge and Connector. Combined with a Heaven smoke, it separates the defensive setup into several isolated areas.
Broken Bridge Smoke
A Broken Bridge smoke helps the Terrorists cross Mid safely.
It can be used to:
- Take central control
- Reach Lower Mid
- Shorten the distance
- Prepare a Connector execute
- Create a fake
Use a flash before walking through the smoke. A defender may be waiting directly beside its edge.
Default Smoke
A smoke in front of Default creates temporary cover for the bomb planter.
The supporting player must control:
- Both smoke edges
- Front Pillar
- Heaven
- Headshot Angle
- CT Spawn
- Plant Box
The smoke does not guarantee a safe plant. A defender may push immediately after hearing the planting sound.
Terrorist Molotovs
Back Pillar Molotov
Back Pillar is one of the strongest defensive positions.
A Molotov forces the defender into the open and prevents them from switching sides after each shot.
The supporting Terrorist should hold the likely escape route. Both players should not focus on the flames because another CT may attack from Heaven or Connector.
Back Site Molotov
Back Site allows a defender to survive the initial smokes and flashes.
A Molotov clears the deeper section of the site and reduces the number of angles that must be checked during the entry.
Headshot Angle Molotov
Headshot Angle is difficult to defeat with a normal peek.
The Molotov forces the opponent to:
- Leave the position
- Use their own smoke
- Fight without the head-level advantage
- Retreat toward Back Site
The entry player watches the escape route while the teammate continues taking the site.
Temple Wall Molotov
A defender at Temple Wall can attack during the bomb plant.
This Molotov removes the position and helps the Terrorists establish control. It can also be used during a late clear when the location of the second defender is unknown.
Plant Box Molotov
A player beside Plant Box can wait through the first flash and surprise the bomb carrier.
The Molotov clears the close angle and makes the plant safer.
Post-Plant Molotov
Saving a Molotov for the post-plant can decide the round.
Do not throw it immediately after the first defuse sound. Consider how much time remains before the explosion and whether the CT has a defuse kit.
A grenade used too early may end before the defender needs to commit to the defuse.
Terrorist Flashbangs
Mid Pop Flash
A Mid pop flash supports the early fight for central control.
It should explode immediately before the entry player appears. The second Terrorist follows and watches Lower Mid or prepares to trade.
Broken Bridge Flash
A high flash above Broken Bridge can blind players near the crossing and deeper Mid angles.
The timing should be coordinated:
- The entry player moves into position.
- The support player throws the flash.
- The grenade explodes behind the entry player.
- The nearest angle is cleared first.
- The support player follows and prepares to trade.
Site Flash
A flash above the bombsite helps the Terrorists enter through Connector, Ramp or Ruins.
Move immediately after the explosion. Waiting allows the defenders to recover and reposition around the pillars.
Heaven Flash
This grenade supports a peek against the elevated position.
It is useful when the Terrorists do not have a Heaven smoke or when the defender has already pushed through the smoke.
Side Hall Flash
The narrow Side Hall provides opportunities for a fast pop flash.
One player throws the grenade while the teammate enters immediately after the explosion. Communication is essential because a poorly timed flash can blind the entry player inside the hallway.
Post-Plant Flash
A Terrorist positioned in Mid, Ruins or Connector can flash the bombsite during the retake.
The teammate should peek as the grenade explodes. A delayed peek gives the defenders time to hide behind a pillar or smoke the bomb.
Terrorist HE Grenades
Broken Bridge HE
An early HE grenade punishes CT players who repeatedly contest Broken Bridge.
Even moderate damage gives the Terrorists an advantage in the following rifle duel.
Back Pillar HE
Use this grenade after confirming that a defender is hiding behind the pillar.
It becomes more effective after the CT player has already taken damage and moved behind cover.
Headshot Angle HE
The protected position limits the defender’s movement. An HE grenade can deal reliable damage and force the CT to leave the angle.
Default HE
A saved HE grenade can interrupt the defuse or eliminate a weakened player near the bomb.
After hearing the defuse:
- Throw the HE.
- Wait for the explosion.
- Watch for a CT leaving the smoke.
- Avoid exposing both Terrorists from the same position.
Standard Terrorist Execute
A basic Sanctum execute can follow this sequence:
- One player watches the early Mid peek.
- The support player prepares a Heaven smoke.
- Connector or CT Spawn is blocked by a second smoke.
- A Molotov clears Back Pillar.
- A flash explodes above Site.
- The entry player checks Front Pillar and Plant Box.
- The support player follows and prepares to trade.
- The bomb is planted for a controlled post-plant position.
- The Terrorists move toward separate angles.
The main grenades should land within a short interval. If too much time passes between the smokes and entry, the defenders can change positions.
Mid and Connector Execute
Taking Mid creates several possible routes toward the bombsite.
A basic sequence can include:
- HE grenade toward Broken Bridge
- Mid pop flash
- Lower Mid check
- CT Stairs smoke
- Connector control
- Back Pillar Molotov
- Site flash
- Coordinated entry
The Terrorists do not need to commit immediately after taking Mid. They can wait for defensive utility to expire before starting the final execute.
Fast Ramp Execute
A quick Ramp attack can work as an occasional surprise.
Useful grenades include:
- Headshot Angle Molotov
- Heaven smoke
- Site flash
- HE grenade for Front Pillar or Plant Box
The entry player must create space instead of stopping inside the narrow entrance. The second Terrorist follows for the trade and bomb plant.
Connector and Side Hall Split
The Terrorists take separate routes and enter the site at the same time.
One player attacks through Connector while the teammate pressures from Side Hall or Ramp. The defenders must watch several directions and cannot comfortably play around the pillars.
Timing is essential. If one player enters too early, the CT side receives two separate one-versus-one fights.
Mid Fake Into Ruins
One Terrorist creates pressure in the center by:
- Smoking Broken Bridge
- Throwing a flash
- Firing at expected defensive positions
- Showing presence near Connector
The bomb carrier prepares a later attack through Ruins.
A believable fake requires more than one grenade. Movement and continued pressure must convince the defenders that Mid control is leading into a real execute.
Counter-Terrorist Utility
Early Ramp Incendiary
An early incendiary can stop a fast execute and give the CT side time to establish stronger positions.
It can:
- Delay the attack
- Deal early damage
- Force the Terrorists to use a smoke
- Reveal the planned pace
- Give the second defender time to prepare supporting utility
Avoid throwing it with the same timing every round. The attackers can wait for the fire to disappear or extinguish it with a smoke.
Ruins HE
An HE grenade punishes Terrorists following a predictable early route through Ruins.
The damage also provides information about how quickly the attacking side is taking the area.
Mid Smoke
A Mid smoke limits early central control and delays movement toward Broken Bridge.
The smoke does not secure the area permanently. Watch its edges and account for a possible drop into Lower Mid.
Connector Smoke
A late Connector smoke can stop the final execute.
The Terrorists must choose between:
- Waiting for the smoke to fade
- Pushing without information
- Returning to another route
- Spending additional utility
This smoke becomes particularly valuable during the final 20 seconds of the round.
Mid Repeek Flash
One defender throws a pop flash while the teammate repeeks Broken Bridge.
The play can recover central control after the initial pressure. Both CT players must agree on the timing to avoid blinding each other.
Default Incendiary
An incendiary on Default stops or interrupts the bomb plant.
It can be used when the execute begins or saved until the planting sound is heard.
Bomb Smoke
A smoke on Default is the most important grenade for a retake.
One defender begins the defuse while the teammate watches the likely post-plant positions. A short tap can force the Terrorists to reveal their locations.
Basic CT Setups
Site and Mid
One defender plays around Back Pillar, Temple Wall or Heaven. The second player controls Mid and Connector.
The site player should survive the initial contact, provide information and delay the plant. Taking an unsupported early duel can leave the teammate in a one-versus-two situation.
Heaven and Back Site
Heaven provides information and a height advantage, while the Back Site player watches the plant.
Do not repeat the setup every round. The Terrorists can counter it with a Heaven smoke and a Back Site Molotov.
Aggressive Broken Bridge Control
One defender contests the bridge with a supporting flash.
The objective does not have to be a kill. The CT can collect information, deal damage and retreat toward CT Stairs.
Continuing the push without support may give the Terrorists a free route toward the bombsite.
Passive Retake Setup
The defenders surrender some early space and prepare to attack after the plant.
This setup uses the short rotations and several entrances into the site. The CT side must preserve a bomb smoke, a flash and at least one grenade for clearing a post-plant position.
How to Retake Sanctum
Sanctum contains several strong post-plant angles. Entering without coordination gives the Terrorists a series of favorable individual fights.
A structured retake should follow this order:
- Identify the plant position.
- Check Lower Mid and the possible flank.
- Smoke the bomb or one strong post-plant angle.
- Use a Molotov against Mid, Ruins or a pillar.
- Flash above Site.
- Enter from two different directions.
- Trade the first engagement.
- Track the remaining defuse time.
- Avoid searching for the final kill if the bomb can be defused safely.
Terrorist Post-Plant Positions
Mid and Ruins
One player controls the bomb from Mid while the teammate remains near Ruins.
The setup creates separate angles and forces the CT side to clear several directions.
Connector and Ramp
The Terrorists occupy opposite sides of the bombsite.
If the defender checks Connector, the Ramp player can peek. If the CT turns toward Ramp, the Connector player watches the bomb.
Heaven and Lower Mid
Using different elevations makes the retake more difficult.
One smoke or flash cannot isolate both Terrorists at once. The Heaven player must still respect a Molotov or a fast push from CT Stairs.
Playing Against a Smoke Defuse
One Terrorist saves an HE grenade or Molotov while the teammate watches the smoke edge.
After hearing the defuse sound:
- Use the grenade.
- Wait for the explosion or flames.
- Check for a defender leaving the smoke.
- Do not expose both Terrorists from the same position.
Force-Buy Utility
Terrorist Force Buy
A practical T-side purchase can include:
- Heaven or CT Spawn smoke
- Back Pillar Molotov
- One flashbang
- Armor
- A pistol or inexpensive weapon
Even a limited purchase can win the round if the utility isolates one defender and creates a safe bomb plant.
Counter-Terrorist Force Buy
The CT side should prioritize:
- Ramp incendiary
- Mid or Ruins HE
- Smoke for delaying or defusing
- Defuse kit
- Close-range weapon
The defuse kit has a major effect on every post-plant because the Terrorists have less time to react to a defuse attempt.
Learn the Utility, Then Read the Round
Sanctum rewards players who understand the purpose of every grenade.
A smoke should separate the defenders. A Molotov should remove a specific position. A flash should create an immediate entry opportunity, while a saved HE can interrupt the defuse.
Sanctum is no longer part of the official Wingman pool and does not affect the professional map veto. However, the skills it develops remain useful across competitive CS2:
- Map control
- Utility management
- Coordinated executes
- Trading
- Timing awareness
- Communication
- Post-plant decision-making
The same principles influence professional matches. Team performance depends on map pools, recent form, side-specific results, utility efficiency, player roles and the ability to adapt during a series.
Winio analyzes these variables across thousands of matches to show what the data says before the server decides the result.
Explore upcoming CS2 matches and data-driven predictions at Winio.