
Warden Grenade Callouts in CS2
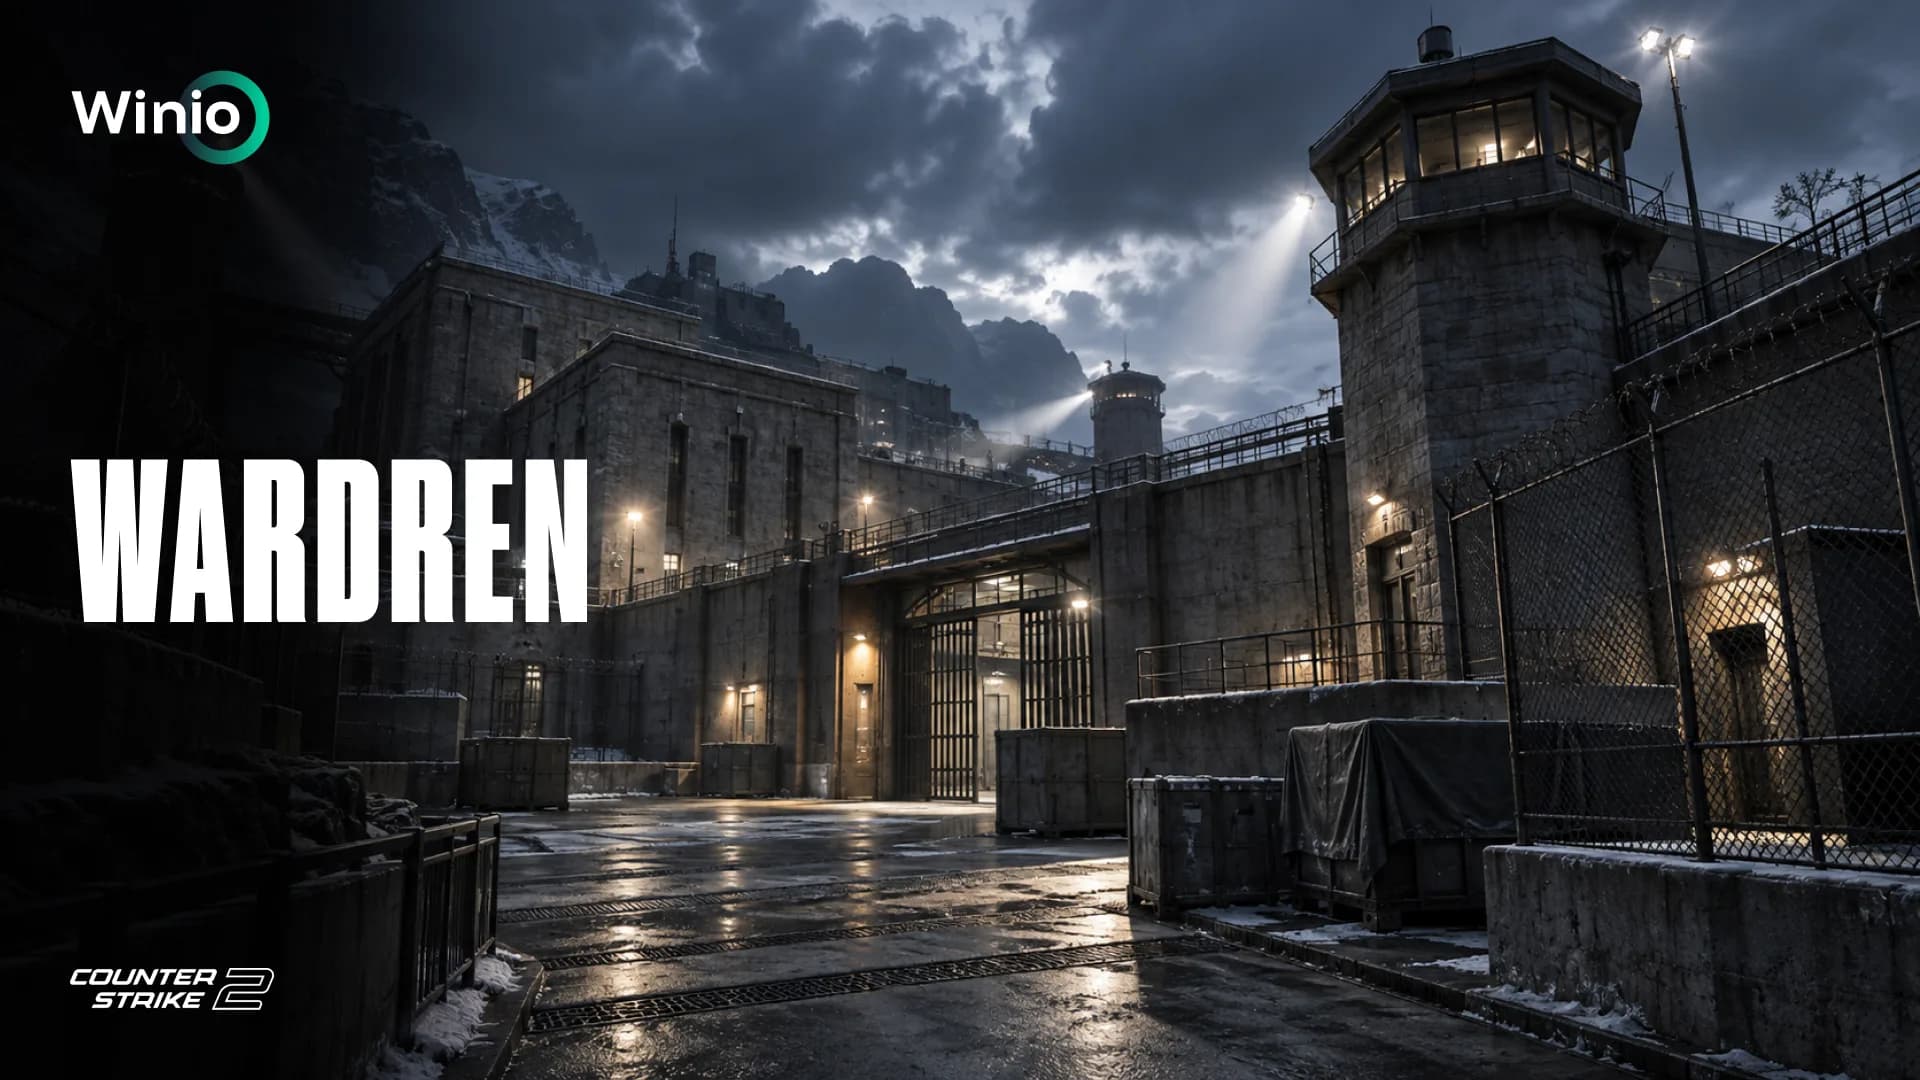
Warden takes CS2 players to an abandoned prison on an island inspired by Alcatraz.
Open courtyards connect with narrow cell blocks, long corridors, towers and multi-level routes. This combination makes utility especially important. Smokes remove long defensive sightlines, Molotovs clear enclosed corners and well-timed flashes allow attackers to enter without giving defenders easy opening kills.
This guide covers the essential Warden grenade lineups, Mid control, A and B executes, defensive utility, retakes and practice commands.
What Is Warden in CS2?
Warden, technically named de_warden, is a community bomb-defusal map with two bombsites.
The map was created by Almaas, Thomas and catfood. Its first public version appeared in the Steam Workshop in May 2024.
Warden was inspired by Alcatraz and takes place inside the abandoned Felsen Prison. The San Francisco skyline and Golden Gate Bridge can be seen in the background.
Who wins?
All MatchesFree Today NODWIN Clutch Series #12
Tomorrow 11:00
 SPARTABAKS
 Free for everyone · factor breakdown
Prediction: SPARTA
71%29%Exort Series #32
LIVE
 BezprizornikiEVOLUPEGG

The map combines:
- Open courtyards
- Prison cells
- Narrow indoor corridors
- Elevated towers
- A central Mid area
- Multiple routes to both bombsites
- Wall openings and skylights for utility
One of Warden’s defining features is the number of alternative routes near each site. If attackers cannot move through the main entrance, they can often redirect through Mid or a nearby connector without returning all the way to T Spawn.
When Was Warden Added to CS2?
Valve added Warden to Competitive, Casual and Deathmatch on January 21, 2026. It entered the game alongside Stronghold and Alpine, according to the official Counter-Strike 2 update.
Warden was not part of Active Duty or Premier. It was available as a separate community map in selected official modes.
Valve removed Warden from official matchmaking on July 8, 2026 during another community map rotation. The map can still be accessed through the Steam Workshop and compatible community servers.
Warden Map Layout
Warden contains two full bombsites connected by a central network of corridors and outdoor paths.
A Site is mostly located outside. A large opening in the brick wall near the site allows players to throw smokes and flashes onto the bombsite without exposing themselves to the main defensive angles.
B Site is inside the prison. A large skylight above the bombsite creates several opportunities for overhead flashes and other utility.
Mid connects the two sides of the map. Controlling it gives the attacking team shorter routes, faster rotations and the ability to change the final target late in the round.
Essential Warden Callouts
Warden callouts never became completely standardized because the map spent a relatively short time in official matchmaking.
Names can vary between regions, teams and community servers. Confirming terminology with teammates before the match can prevent confusion.
Warden Mid Callouts
The most common Mid callouts include:
- Mid
- Pillar
- Catwalk or Cat
- Window
- Connector
- Outside
- Steps
Mid is the central control area. The team holding it can quickly pressure either bombsite.
Pillar refers to the large central cover structure.
Catwalk, often shortened to Cat, is the elevated path connecting Mid with A.
Window is a common defensive position overlooking part of the central route.
Connector links Mid with the surrounding site routes and defensive rotations.
Warden A Site Callouts
The main A Site callouts are:
- A Site
- Default
- Ramp
- A Short
- A Long
- Heaven
- Back A
- Wall Hole
Ramp and A Long provide the main attacking approach.
A Short connects Mid with the site and is essential for split executes.
Heaven is an elevated defensive position overlooking part of the bombsite.
Back A is the deep section of the site commonly used by the anchor.
Wall Hole is the opening in the brick wall near A. Players can throw smokes and flashes through it.
Warden B Site Callouts
The main B Site callouts include:
- B Site
- B Halls
- Tunnel
- Close
- Platform
- Back B
- Skylight
- Default
B Halls is one of the primary routes used by the T side.
Tunnel leads into the enclosed part of the bombsite and creates several close-range fights.
Close refers to the nearest corner beside the entrance.
Platform is an elevated position inside B.
Back B is the deepest part of the bombsite.
Skylight is the large roof window above B and one of the most important landmarks for grenade lineups.
Why Utility Is Important on Warden
Warden contains many corners, levels and overlapping lines of sight.
Without utility, attackers must clear these angles individually. A defender can take one duel, fall back and delay the execute until the rotation arrives.
Proper grenade usage helps teams:
- Block long sightlines
- Separate defenders
- Clear close corners
- Take Mid safely
- Delay fast executes
- Hide a late rotation
- Start coordinated retakes
- Protect a plant or defuse
Pop flashes are especially effective on Warden. Walls, doorways and roof structures allow flashes to detonate immediately before a player enters a contested area.
Commands for Practicing Warden Lineups
Create a local server and enter the following commands in the developer console:
- sv_cheats 1
- mp_warmup_end
- mp_roundtime_defuse 60
- mp_freezetime 0
- mp_buy_anywhere 1
- mp_buytime 9999
- sv_infinite_ammo 1
- ammo_grenade_limit_total 5
- sv_grenade_trajectory_prac_pipreview 1
- sv_rethrow_last_grenade
- bot_kick
sv_grenade_trajectory_prac_pipreview 1 displays the grenade trajectory and landing position.
sv_rethrow_last_grenade repeats the previous throw. This is useful for checking whether a flash blinds a particular defensive angle.
Always test saved lineups on the current Workshop version. Community map creators may adjust geometry, textures or reference points between updates.
Warden Mid Grenade Lineups
Mid control is the foundation of most structured T-side rounds.
Taking the central area allows the Terrorists to:
- Reach A through Cat
- Pressure Connector
- Split B
- Intercept rotations
- Fake one bombsite and attack the other
- Force CT players away from their preferred positions
Window Smoke
The Window smoke blocks one of the most important defensive sightlines into Mid.
The purpose of the smoke is not to give the attacking team complete control. It reduces the number of angles the entry players need to clear at the same time.
After the smoke lands, attackers should focus on:
- Pillar
- Catwalk
- Close Connector
- The edge of the smoke
- Possible aggressive CT positions
A flash should support the initial entry. A defender may play near the smoke or push through it after hearing movement.
Connector Smoke
The Connector smoke separates the Mid defender from players positioned closer to the bombsites.
It is particularly useful before a split execute. While the smoke remains active, Terrorists can take Pillar and move toward Cat without fighting the entire CT setup at once.
One player should continue watching the smoke. Leaving it unattended creates an opportunity for the defense to push and flank the attacking group.
Pillar Molotov
Pillar provides strong cover in the central area.
The Molotov should burn both the protected position and the defender’s escape route. If the fire lands only in front of the cover, the CT player can remain behind it.
After throwing the Molotov, check:
- Catwalk
- Window
- Connector
- The edge of the smoke
- The defender escaping from the flames
Mid Flash
A high flash above Mid can support a coordinated entry.
The support player should remain behind the entry fraggers. The first attacker begins moving so that the flash detonates immediately before contact with Window or Pillar.
An early flash gives the defenders enough time to turn away and return to their angles before the attackers arrive.
Warden A Site Grenade Lineups
A Site contains several levels and entrances. Attacking only through Ramp or A Long allows the CT side to focus on a single direction.
A more reliable execute combines pressure from the main entrance with a split through A Short.
Heaven Smoke
Heaven provides an elevated view across the site and its approaches.
A smoke in this position:
- Isolates the upper defender
- Makes planting safer
- Removes a strong AWP angle
- Delays the beginning of the retake
The smoke must completely block the defensive line of sight. A gap between the smoke and the wall can allow an AWPer to continue watching the bombsite.
Back A Smoke
Back A is a common anchor position.
Smoking the deep section of the site allows the attacking team to take Default and the nearby planting area.
The smoke must still be watched. A defender can use it as cover and push through while the bomb is being planted.
Wall Hole Flash
The opening in the brick wall is one of the defining features of A Site.
A flash thrown through Wall Hole can detonate above the bombsite and blind defenders playing Default, Back A and nearby angles.
A basic timing sequence looks like this:
- The support player announces the flash.
- The entry fraggers prepare at the main entrance.
- The flash is thrown through Wall Hole.
- The attacking group moves before the grenade explodes.
- The second player clears the upper position and prepares to trade.
The flash becomes even stronger when another group attacks through A Short at the same time.
Default Molotov
A defender near Default can stop the execute from close range.
A Molotov forces the player to:
- Move into an exposed position
- Fall deeper into the bombsite
- Use a smoke to extinguish the fire
- Give up the safest close-range angle
If the CT player uses a smoke, the sound and position of the grenade provide additional information to the attackers.
Back A Molotov
A Molotov for Back A prevents the anchor from hiding behind cover until the entry flashes have expired.
Throw it immediately before the execute. If it lands too early, the fire will disappear before the attacking team reaches the site.
Close A HE Grenade
An HE grenade is useful against a defender repeatedly playing near the main entrance.
Even if it does not secure a kill, the damage makes the opening duel easier. The team can follow the explosion with a pop flash and immediate entry.
Complete Warden A Execute
A basic A execute can follow this sequence:
- Two players establish Mid control.
- One player watches for defensive aggression.
- Heaven is blocked with a smoke.
- Back A is smoked or cleared with a Molotov.
- A flash is thrown through Wall Hole.
- The main group attacks through Ramp or A Long.
- The Mid players enter through Cat and A Short.
- The bomb is planted for both groups.
Timing is the most important part of the split.
If the A Short players enter too early, the defense can eliminate them before turning toward the main entrance.
Warden B Site Grenade Lineups
B Site is indoors and contains several close corners.
A dry entry through B Halls often results in the first attacker dying without a trade. The execute should remove Close, Platform and Back B before the main group commits.
Skylight Flash
The roof window is the most important utility landmark on B.
A flash thrown through Skylight detonates above the site and blinds defenders looking toward the main entrance.
The grenade is effective because:
- It arrives from above
- It can be difficult to spot
- Defenders have little time to react
- Proper positioning prevents it from blinding the entry players
The attackers should begin moving before the flash explodes. Waiting for visual confirmation wastes most of the blinding effect.
Platform Smoke
A defender on Platform can watch the entrance and move between several pieces of cover.
The smoke removes this sightline and separates the player from teammates inside the bombsite.
Attackers should still watch the edges. The defender may push through the smoke during the entry or bomb plant.
Back B Smoke
A smoke in Back B allows the attacking team to take the near side of the bombsite.
It works best when combined with a Molotov for Close. Using only the smoke leaves the nearest defender free to fight before the Terrorists gain space.
Close Molotov
Close should be cleared before the full execute begins.
The Molotov needs to cover the entire corner. Once it lands, the first attacker watches for a defender escaping the fire while the second player clears Platform.
Back B Molotov
A Back B Molotov prevents the anchor from waiting safely behind cover.
It should land immediately before the execute. Throwing it too early allows the CT player to retake the same position after the flames disappear.
B Halls HE Grenade
The CT side can use an HE grenade against Terrorists gathering inside B Halls.
The narrow corridor increases the chance of damaging multiple players. Terrorists should avoid standing together near the entrance before the execute begins.
Complete Warden B Execute
A basic utility setup for B includes:
- Platform smoke
- Back B smoke
- Close Molotov
- Skylight flash
- Additional B Halls flash
- HE grenade for a known anchor position
Execute the grenades in the following order:
- The Close Molotov removes the nearest defender.
- Platform and Back B are blocked with smokes.
- The Skylight flash detonates over the site.
- The entry fragger enters the bombsite.
- The second player clears close cover and prepares to trade.
- The third player watches the flank and rotation.
- The bomb is planted for a predetermined post-plant setup.
Defensive Warden Grenades
Counter-Terrorists should avoid spending every grenade during the opening seconds.
Warden allows attackers to change direction through Mid. A late smoke or Molotov can be more valuable than an early attempt to deal uncertain damage.
Early Mid Molotov
A Molotov on the main T entrance to Mid can:
- Delay central control
- Reveal the attacking team’s intentions
- Force the Terrorists to use a smoke
- Give the defender time to reach Window or Catwalk
The CT side does not need to continue fighting after throwing the grenade. Its primary purpose is to gain time and information.
HE After the Molotov Is Extinguished
If the Terrorists extinguish the flames with a smoke, a CT player can throw an HE grenade into the center of it.
Attackers often push immediately after putting out the fire, creating an opportunity to damage several players.
Defensive Mid Flash
A flash from Connector or a nearby protected route allows the Mid defender to take a second fight.
A simple setup works as follows:
- The first CT spots multiple Terrorists.
- The player falls behind cover.
- A teammate throws a flash.
- The first defender peeks again.
- The second player watches for the trade.
A Default Molotov
A late Molotov on Default can stop the bomb plant and give the rotation more time to arrive.
Do not throw it after hearing only one step or grenade. The Terrorists may be showing pressure before rotating back through Mid.
Defensive Wall Hole Flash
Wall Hole can also be used by the defense.
A CT player can throw a flash through the opening when the Terrorists begin entering A. The anchor should turn away or hide before the grenade detonates.
B Halls Molotov
A Molotov in B Halls delays a fast rush and separates the attacking players.
If part of the team crosses before the flames appear, the defenders can fight that group before the remaining Terrorists arrive.
Defensive Skylight Flash
A flash through Skylight can support a second peek or the beginning of a retake.
It allows the B anchor to:
- Change position
- Recheck the entrance
- Support the rotation
- Interrupt the bomb plant
- Force the attackers to turn away
How to Retake A on Warden
Before starting the retake, identify which areas the Terrorists control.
The main threats include:
- A Short
- A Long
- Back A
- Default
- Heaven
- Smoke edges
A coordinated retake can follow this sequence:
- Wait for the nearest teammate.
- Smoke A Short or another post-plant position.
- Use a Molotov to clear Default.
- Throw a flash above the bombsite.
- The first CT starts clearing angles.
- The second player follows and prepares to trade.
- Another defender watches the flank.
Avoid clearing two vertical levels at the same time. Isolate one part of the site and remove the remaining positions in a controlled order.
How to Retake B on Warden
B is difficult to retake without flashes because of its many enclosed angles.
The CT side should ideally save:
- One smoke
- One Molotov
- Two flashes
- A defuse kit
The smoke can isolate Back B or protect the player defusing the bomb. The Molotov clears the nearest post-plant position, while a Skylight flash begins the coordinated entry.
Entering individually is the most common retake mistake. It gives the Terrorists a series of separate duels instead of one organized defensive challenge.
Learn the Utility, Then Read the Match
Knowing grenade lineups makes Warden easier to control, but map knowledge is only one part of match analysis.
Other important factors include:
- Recent team form
- T and CT-side results
- Player roles
- Individual performance
- Map pools
- Head-to-head history
- Tactical flexibility
- The current competitive meta
Winio processes these variables across thousands of matches to show what the data says before the server decides the result.
Explore upcoming CS2 matches and data-driven predictions at Winio.